

TL;DR - If you already have everything set up - head on over to the azure-dyndns repository and choose your client!
Update: Use configuration file instead of command line arguments for better security.
Over the years, I've come to run an infrastructure at home that could probably rival a small business - especially after COVID-19 kickstarted the home office era.
Some things rely on some DNS records being updated with my home network IP as it changes whenever there's a power outage, router reboot or ISP whims.
Luckily, my Unifi Security Gateway supports dynamic DNS through a list of supported providers and many other products do as well.
However, unless I pay, many of them will ask me to manually confirm that I wish to keep my dynamic DNS alive through e-mails and whatnot. That's fine - it's a business and for many that is the best approach as it's the easiest approach.
I do, however, already have an Azure subscription and I have my domains set up using Azure DNS so - why not use that directly?
I'll show the approach of setting everything up using either the Azure Portal or the Az CLI - but you can also use PowerShell, for example.
Our mission
We will do the following in this post:
- Create a Azure DNS zone
- Create a service principal for automation with limited access
- Install and run the Azure DynDns client
- Set up periodical updates
Fill your cup and lets dive in!
Setting up Azure DNS
Az CLI
Using the az CLI (installation instructions here) is my favorite as it is quick and easily available through the terminal (I'm a sucker for WSL).
We'll need a resource group to place the Azure DNS zone in - let's create it!
az group create --name HomeOffice --location northeurope (for valid locations, do az account list-locations)
Assuming you already have a domain ready to go (you don't need one for this exercise - it can be fake), all you need to do is issue the following command:
az network dns zone create -g HomeOffice -n homeoffice.com
The result should be something like this (abbreviated some):
{
  "etag": "00000002-0000-0000-5d4a-8934397fd701",
  "id": "/subscriptions/xxxx-xxx-xxxx-xxx/resourceGroups/homeoffice/providers/Microsoft.Network/dnszones/homeoffice.com",
  "location": "global",
  "maxNumberOfRecordSets": 10000,
  "maxNumberOfRecordsPerRecordSet": null,
  "name": "homeoffice.com",
  "nameServers": [
    "ns1-08.azure-dns.com.",
    "ns2-08.azure-dns.net.",
    "ns3-08.azure-dns.org.",
    "ns4-08.azure-dns.info."
  ],
  "numberOfRecordSets": 2,
  "registrationVirtualNetworks": null,
  "resolutionVirtualNetworks": null,
  "resourceGroup": "homeoffice",
  "tags": {},
  "type": "Microsoft.Network/dnszones",
  "zoneType": "Public"
}
The nameServers property contains what you need to inform your domain provider in order for your domain to work out there in the real world - but you can also add these to your local DNS servers and the domain can be your little internal secret 👍
In any case - the domain homeoffice.com is ready to go!
Oh, take note of the id part in the result - we'll need it in a sec.
Azure Portal
Navigate to Azure Portal and click Create a resource and search for DNS Zone
Fill in your resource group and the domain you wish to use - we use homeoffice.com in this example.
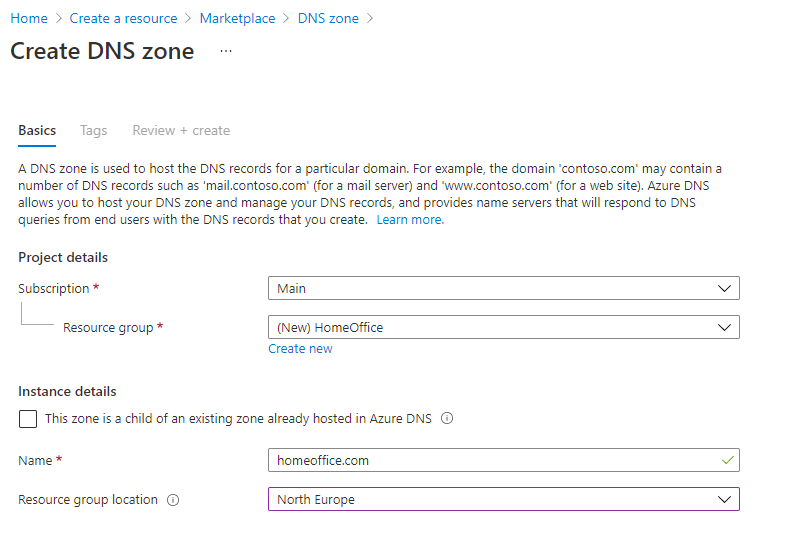
Once this is done provisioning we are ready to move on!
Creating a service principal
Now that we have our Azure DNS we need a service principal that we can use to automatically update the records.
This is so we can have a separate account that only has access to this one thing and can be used for automation instead of your awesomely privileged personal account.
Az CLI
Did you take note of the id part from when you created the DNS zone? Time to put it to use!
Creating the Azure service principal with access only to our homeoffice.com domain can be done in one fell swoop:
az ad sp create-for-rbac -n "Azure-DynDns" --role "DNS Zone Contributor" --scope <insert your resource ID here>
For example:
az ad sp create-for-rbac -n "Azure-DynDns" --role "DNS Zone Contributor" --scope /subscriptions/123456-abcd-4746-8d25-f1e68fde5b78/resourceGroups/homeoffice/providers/Microsoft.Network/dnszones/homeoffice.comYou'll get an output which you'll want to take note of (spoiler alert: It contains the super secret password for the account!):
{
  "appId": "09c03b5b-1977-4187-9f8d-1b02d5e1f78b",
  "displayName": "Azure-DynDns",
  "name": "09c03b5b-1977-4187-9f8d-1b02d5e1f78b",
  "password": "LAZ~f~2Z4KireI2R4p_ARxGGDPLCsnF~YA",
  "tenant": "654321-edcba-4c90-855c-dc82f009eeb7"
}
Store this information in a secure place - not on some public blog or something.
We need three things from this JSON data:
| Property | Description |
|---|---|
appId |
This is the username, if you will, of the service principal. Often referred to as clientId |
password |
Yup - the password! Also referred to by another name: clientSecret |
tenant |
Which Azure Active Directory does this service principal belong to |
Azure Portal
Creating a service principal in the portal has a few steps and they are quite nicely laid out here.
As the clients don't support certificate authentication as of time of writing, choose Option 2: Create a new application secret to get a password for your service principal. Save this! It's the only time you will see it and you'll need it later.
Now, let's grant access to our DNS zone.
Navigate to the DNS zone and click on Access Control - here we can add a role assignment:
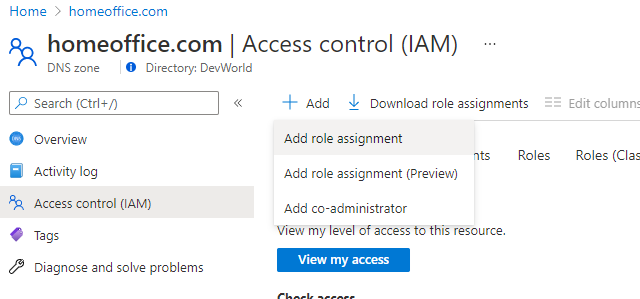
Select the DNS Zone Contributor role and search for your service principal
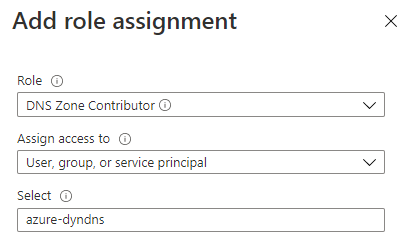
And done!
Gathering the data we need
Before we can start updating our DNS records, we need a few key items that we have gathered along the way.
| Parameter | Description |
|---|---|
| clientId | This is the appId from the service principal |
| clientSecret | The password/secret that was created when we created our service principal |
| tenantId | Your Azure Active Directory tenant id |
| subscriptionId | The Azure subscription where your Azure DNS lives |
Most of these we already have so let's get the final piece of the puzzle - the subscription id.
Using az: az account show
Look for the id property in the result returned from the command.
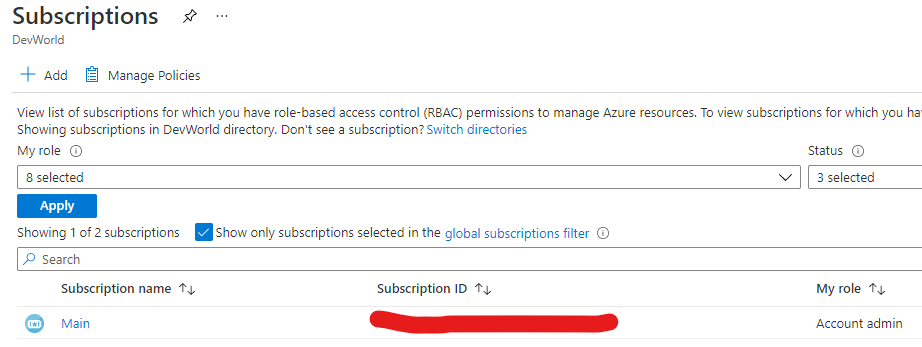
Using Azure Portal: Click on Subscriptions and you will see the subscription id
Let's create our configuration file - name it, for example, azure-dyndns.json and make sure only you can read it (it will contain secrets, after all).
{
        "subscriptionId": "<subscriptionId>",
        "resourceGroup": "<name of the resource group where Azure DNS is located>",
        "zoneName": "<name of the Azure DNS zone>",
        "recordName": "<name of the record you wish to update>",
        "clientId": "<clientId>",
        "clientSecret": "<clientSecret>",
        "tenantId": "<tenantId>"
}
Updating the DNS record
To update the DNS record(s) I have created a couple of clients so you may choose your poison, as it were, in my azure-dyns repository.
These clients all make use of the Azure SDK and authenticates using the service principal we created above.
Let's use the Go client as an example - if you choose another, simply read the instructions and the arguments should be similar.
We'll install it like so:
go get -u github.com/frodehus/azure-dyndns/azure-dyndns-client
Run the client using the configuration file we created:
azure-dyndns-client -config azure-dyndns.jsonYou can also run it using full command line arguments - but even if you can specify your client-secret in the command line, you shouldn't as it may show up in logs, history and process listings.
Instead, you can specify environment variables and omit some of the arguments:
export AZURE_TENANT_ID=654321-edcba-4c90-855c-dc82f009eeb7
export AZURE_CLIENT_ID=09c03b5b-1977-4187-9f8d-1b02d5e1f78b
export AZURE_CLIENT_SECRET=LAZ~f~2Z4KireI2R4p_ARxGGDPLCsnF~YA

azure-dyndns-client -record office -resource-group HomeOffice -subscription-id 4d1c770c-574d-4746-8d25-f1e68fde5b78 -zone homeoffice.com
The environment variables will only be visible to your logged in account so it's, uhm, semi-safe.
Anyway, once you run the command, you'll see output similar to this (depending on the client):
{
    "etag": "8f43dbe3-a216-43f4-af87-5c7e981a65b2",
    "properties": {
        "ARecords": [
            {
                "ipv4Address": "1.2.3.4"
            }
        ],
        "TTL": 300,
        "targetResource": {}
    }
}
This is signs of great success! We have successfully updated our office.homeoffice.com (naming could be improved) with our current public IP!
Making sure it keeps getting updated
So, we've managed to create/update a DNS record - but we want this to happen without our interaction.
Automatically, as it were.
This is where it all depends on your setup - linux/windows/raspberry pi/?
The scheduled update should be running on a device that's mostly up and running 24/7 for this to be of value so how you do this will be your homework - I leave some ideas here below.
Crontab linux PCs and Raspberry Pi
Using crontab is quite handy and if you don't remember the syntax, I like this handy generator.
Execute crontab -e and add your instruction, for example:
*/30 * * * * azure-dyndns-client -config /home/user/azure-dyndns.json > dyndns.txtYou can then check the output in dyndns.txt to make sure no errors have occured or the successful record update.
Windows scheduled task
You can use the Windows command line to create scheduled tasks like, for example, this that will run each day:
SCHTASKS /CREATE /SC DAILY /TN "Azure DynDns" /TR "<path to client>\azure-dyndns-client -config azure-dyndns.json" /ST 11:00Look into schtasks for more options.
Summing up
Hopefully, by now you have a functioning Azure Dynamic DNS running - good job!
If there are some things that are unclear or need more detail, please let me know 😊